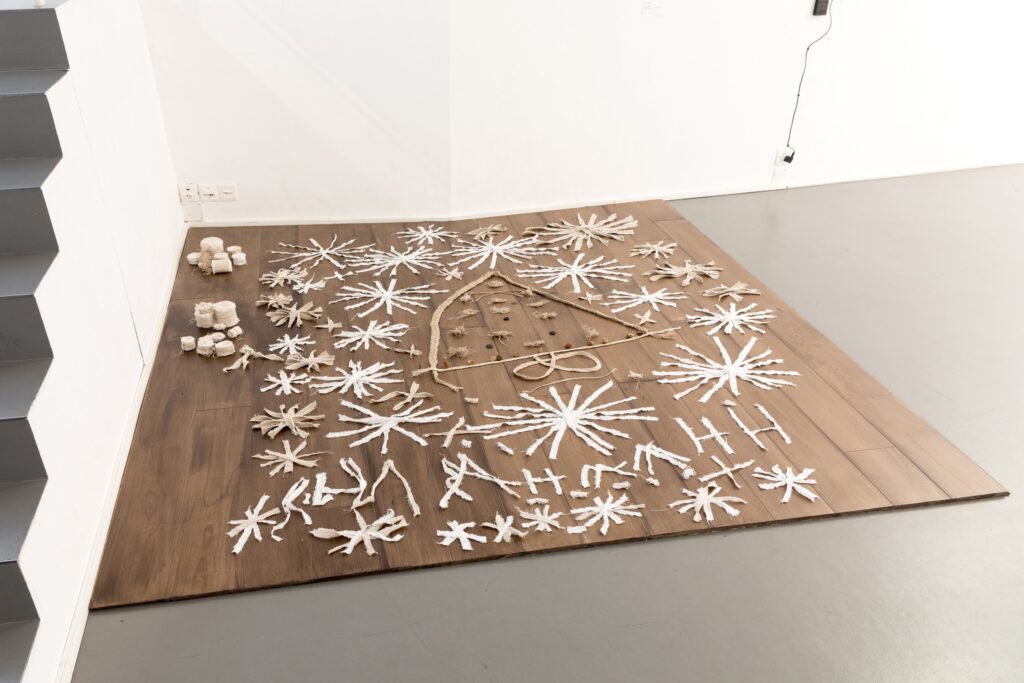
How to… reconstruct a work of art
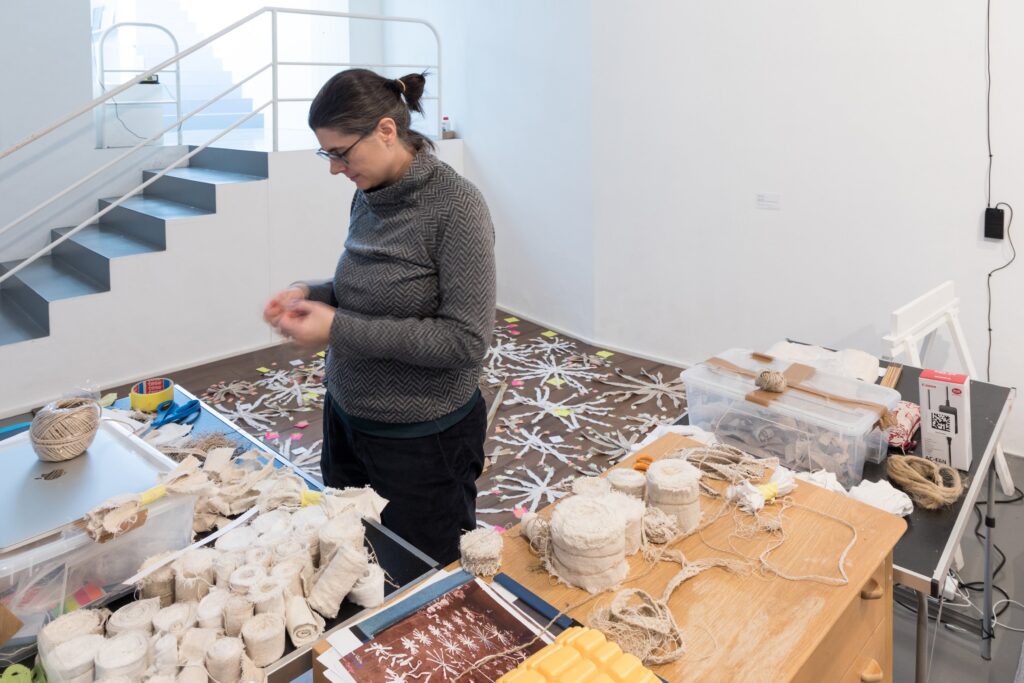
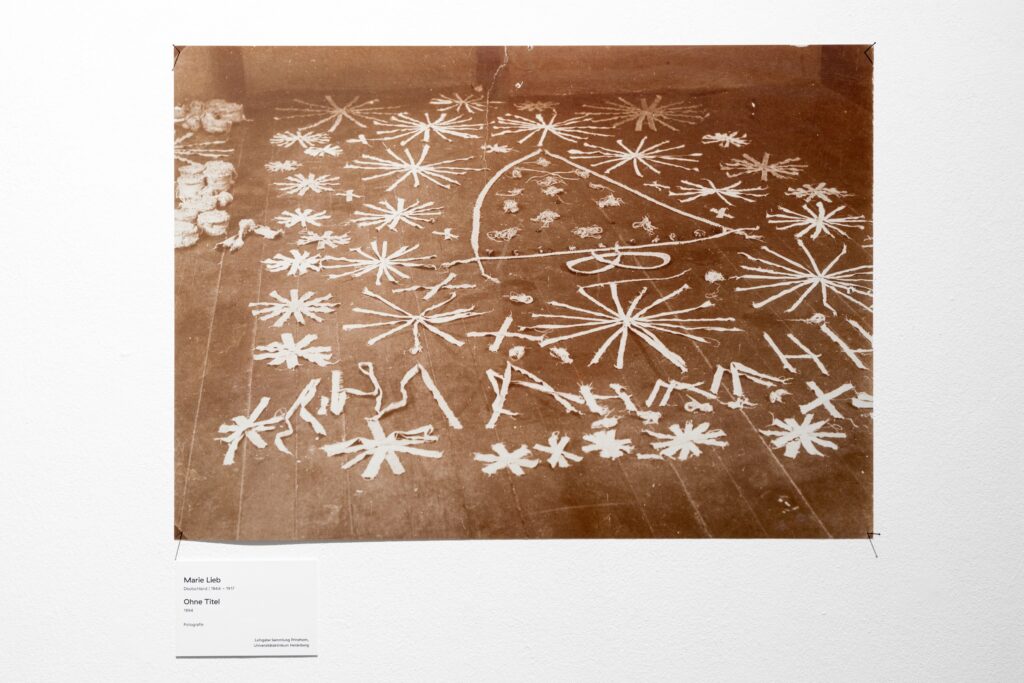
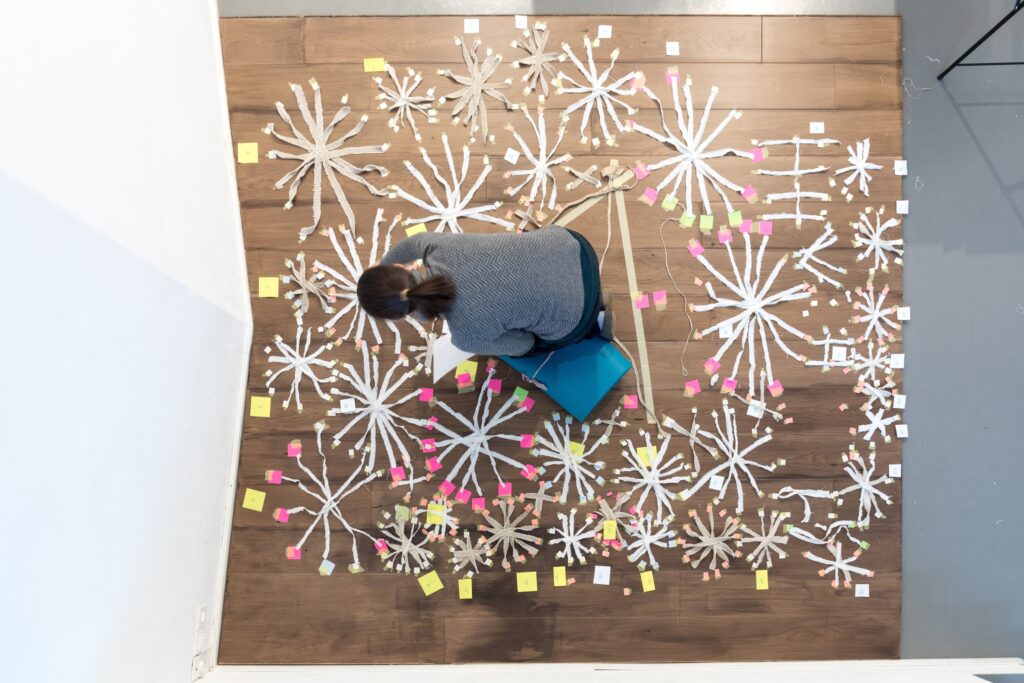
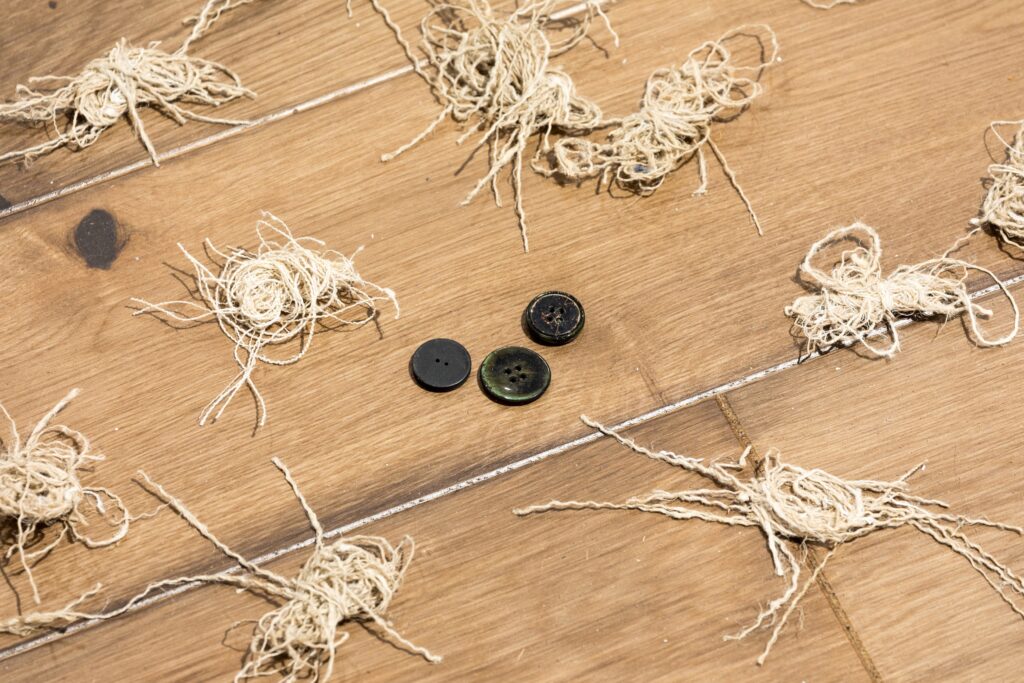
Sarah Lebeck-Jobe is a research assistant at the Institute for Music Research at ZHdK, a family therapist and artist – and she is one of our most important supporters when it comes to archiving and storing our collection objects or setting up a new exhibition. For the exhibition (de)coded, Sarah Lebeck-Jobe has taken on the task of reconstructing Marie Lieb’s installation based on a single photograph. We spoke to her about the lengthy and challenging process. Together with Marisa Baumgartner, you spent what felt like day and night in the museum for almost three weeks to recreate Marie Lieb’s installation using an old black and white photo. How easy or difficult was that? It was actually very challenging. The first difficulty in recreating it was that we don’t know exactly how big the room was in which Marie Lieb laid her work on the floor. Nor do we know how wide the strips of fabric actually were. We lacked a frame of reference to understand the relative size of the elements. How did you solve the problem? I had the idea of using the so-called onion skinning technique to achieve the most accurate reproduction of the photograph. In other words, I placed my camera on a tripod and pointed it at the floor. Connected to my laptop, I was able to see a live view of what the camera was capturing at that moment. This live image was then overlaid with the original recording. By viewing both images simultaneously, I was able to set up the installation to match the photo. That actually sounds quite simple. Was it? No, that’s when the work really started. I had to find out how I could match the perspective with my camera. This was anything but easy, because the camera that had been used to take the photo so long ago had a different lens, of course – but I did my best, also thanks to the help of my husband, who tilted the tripod or held the camera while I looked at the screen. I then aligned the straight lines of the floorboards in the photo so that they matched our floorboards in the museum. Once I was happy with the perspective, the next step was to determine the size of the room. I used the three knobs in the original photo to help me decide. I placed the buttons on the floor and adjusted the zoom of the overlay so that the buttons in the photo were roughly the same size as the buttons on the floor – although of course this is still only an approximation of the original size. After all, buttons are not a uniform size and we couldn’t use the original materials from back then. That does sound very time-consuming. Did you have any other supporters apart from your husband? Marisa Baumgartner was incredibly helpful with the second part of the recreation process. This consisted of finding out how to measure the size of the individual strips of fabric. I decided to use small pieces of paper to mark the beginning and end of each strip on the floor. You have to remember that there are at least 225 individual strips, so about 450 paper marks! Marisa helped me find the positions for many of the markers. She looked at the computer screen while I tried to find the edge of each strip on the floor: “More to the left, and a little more… Stop!” We numbered all the elements and then made a list of all the measurements of the fabric strips needed for each element. How did you get the different strips of fabric to look like the original picture? The cutting was the next challenge. We wanted to use as much of the old material we had borrowed from Charlotte McGowan-Griffin as possible. So I started with the pieces that were already cut into usable lengths. Then we set about cutting out the very long rags. We had to tear some of the longest borrowed strips into thinner strips so that they matched the strips in the photo better. This worked best when Marisa held the end of a long strip – and I tore the other end. This made the line straighter. Then we placed each piece on the corresponding star or cross element. We had to pay attention to what type of fabric was needed for each element – because if I can make it out correctly from the original photo, Lieb used three different types of fabric. That’s why we also used three different ones: a white fabric, a beige linen and a thicker brown fabric. Scraps of fabric, buttons – are there any other materials in the picture or the installation? Oh yes, if you look closely, you will see that there are eleven pieces of dried bread in the middle of the installation, which are also part of Marie Lieb’s arrangement. Even though the strips of fabric are certainly the most present, there are always other everyday objects that she has included in the ornaments on the floor. … like these threads, for example? What are they all about? In fact, there are also many braided elements in Marie Lieb’s work. To recreate these, we used long pieces of thread from the old fabric or unraveled new flax cords to create the hairy structure of the thickest braid. This was certainly one of the most time-consuming parts of the process. That’s why we were happy to receive support from Skye Daniels. She braided the larger plaits using a 5-strand braiding technique. Was that the last step in the reconstruction of the work? It wasn’t the last, but it was a very important one. We finally had all the elements together and were able to place them in their respective positions thanks to the markings. Once that was complete, I removed all the markings and adjusted the strips as accurately as possible on the computer using the onion skinning technique. Did the result meet your expectations? I actually struggled for a long time to achieve “perfection”, I wanted the reconstruction to look exactly like the photograph. But at some point I had to admit to myself that even this version of the installation could never match the photograph exactly, there are simply too many unknown variables and we couldn’t use the same fabric that Marie Lieb had used. That’s why at some point I did manage to let go of my perfectionism – and I’m now very happy with the result. The reconstruction process was documented photographically by Pascal Sigrist. Many thanks for this!